Overdue Cards and a Life Update

So, I know the cards I’m sharing today are almost 3 months overdue, but at least I’m getting around to sharing them eventually!  And rest assured, I did send them out within a reasonable amount of time, I just haven’t posted about them here yet.

*insert shrugging emoji here*

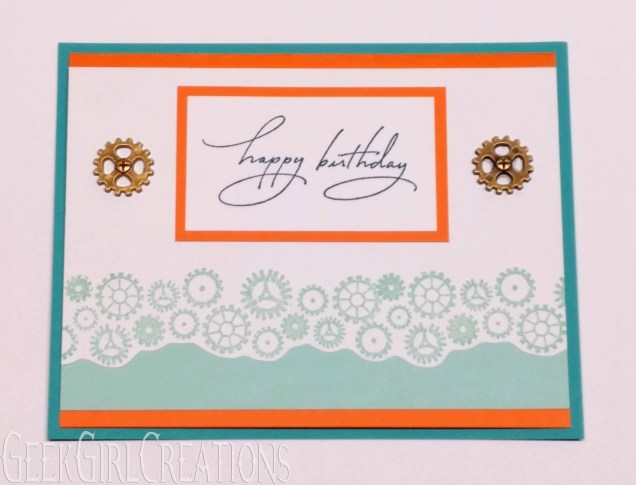
These are the thank you cards I made to send to people after Christmas.

20190101_204227

All three were made with the same layout, just with different papers and cardstock colors.  All the patterned papers were scraps I had leftover from previous projects and I just scrounged through my embellishment folder to find stickers that matched.  I’m not crazy about the one on the right with the tree, but that’s the only sticker I had that was a good color match.

So yeah, Christmas thank you cards… in March…

But lest you think that I’ve just been wasting the past few months away doing nothing, here’s a peek at what has actually been keeping me busy.

First off, my dad and I built this DVD shelf for my hobbit hole.

20190110_183936

He did all the wood cutting and I helped with the construction and did almost all the sanding and almost all the varnishing (Mom helped with that some).  I love how it turned out, even though it doesn’t really match the rest of my furniture, which is much darker in color.  But it’s pretty and serves its purpose well.  But that was a multi-week project, only made more difficult by doing it in the winter!  We had to run the heater in the garage for a few days to get all the varnishing done.

20190102_225339

I’ve also recently gotten into diamond painting, which is essentially a combination of cross stitch and paint by number but with little jewels instead of thread.  It’s fun and relaxing in a mind-numbing kind of way.  Something easy to do when you don’t really want to think that hard about what you’re doing.  I did an easy snowman one to start with, then started on this much more complicated and detailed one that my parents got for me.  I’m about halfway done with it and will share a picture when complete.  I have one more to do that my penpal sent me for my birthday last year, and I’m really excited to start on that one!  It’s a How To Train Your Dragon picture.  🙂

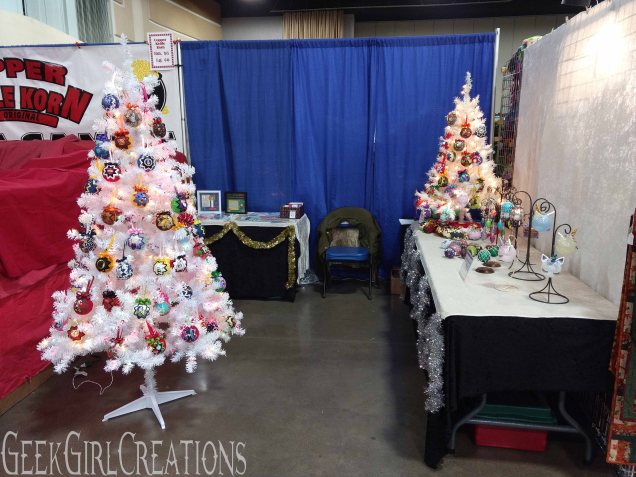
And finally, I’m working hard on making more ornaments for craft shows this fall.

I took this mess:20190114_191438

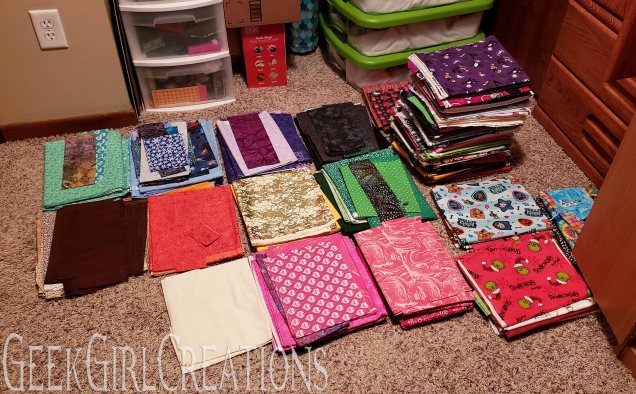
and cut it down to this:

20190127_152900

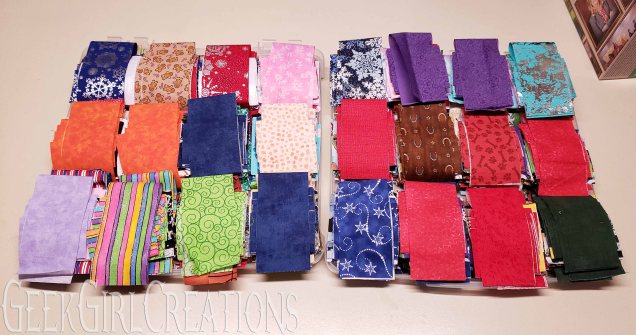
I mean, obviously ALL that fabric on the floor isn’t in these neat little piles, but this is where I started with creating new ornaments.  And this is just for picture ornaments.  I haven’t even cut fabric for the quilted star designs yet!  Besides the fact that since these piles were cut, I got some fabric for a couple more picture designs.   *insert shrugging emoji here*

So my typical Saturdays, Sunday afternoons, and free evenings have looked a lot like this lately:

20190309_125046

I have also started a Facebook page for my ornaments, Geek Girl Creations, which you can find here

There’s a couple different different pages by that name, so if you search for it on FB, make sure to look for my logo:

geek coat of arms final 3

I have pictures of all my ornaments available for sale there, so be sure to go check it out!

I’ve also started an Instagram account by that same name with the same logo to share my ornaments, so go follow me there as well!

So yeah, that’s what’s keeping me busy these days.  I’m planning on going to a couple craft shows this fall, so I’m really trying to build up a good stock of variety to sell.  One of those trays of cut fabric is about 2/3 done though, so that’s pretty good progress, I think.  Still so much to do, though, so I better get back at it!

Happy Sunday!

Card #123: 2 Christmas designs

Hello readers!

I hope you all had a fantastic Christmas!  I sure did.  I didn’t get nearly enough sleep the night before so I had to indulge in a Mt. Dew to have enough energy for the day, but it was a great day spent with family and eating too much.

And now we’re only a couple days away from New Years!  I have absolutely no plans, which suits me just fine.  I’ll probably just get cozy in my pjs and watch movies all night.  These days staying up til midnight is a regular occurrence anyway, so it doesn’t seem like that big of a deal to me like it did when I was a kid.

I am hoping to be super productive over my lovely 4-day weekend, though, and sharing my Christmas cards with you is on my to-do list, so here we go!

I think I mentioned in my last post that I was making 2 different styles of Christmas cards this year, one for family and friends and another for a card exchange I participated in.  Gotta be honest, the card exchange was a little disappointing since I got one homemade card and the rest were store bought.  Not that there’s anything wrong with store bought cards, but when you put the time and effort into making nice cards and expect there to be a few like that in return, it gets a little disappointing.  Pretty sure that’ll be the last card exchange I sign up for.

But at any rate, I had fun crafting something different than Christmas ornaments and I think they turned out pretty nice.

IMG_20181203_091900475

IMG_20181203_091921801

This was the design I made for the exchange.  I cut out the white and green scrolled backgrounds and the three letters on my Cricut. The hedgehog was stamped and colored, then I just free-hand cut him out.  I didn’t have enough of one red for all the card bases, so I used two different shades, but since no one was getting more than one card, it didn’t really matter.  🙂  The green frame is attached with mounting foam to create some depth on the card, then I just added the little sparkly drop stickers to make it look more interesting.

And this is the card I made to send to family and friends.  I wanted to stick with a simple color palette, and quite honestly I just dug through my drawer of cardstock to find something that I had enough of for all the cards and then based the design off that.  I will admit it took a while for inspiration to strike for this card and I sent a couple in-progress pictures to my mom to get a second opinion.  The nativity picture and the large star are embossed with silver embossing powder, then I just added the little stars with a silver stamp pad.  I also used the Cricut to cut out the diamond the star is stamped on.  That was the only way it was going to look nice and even!  Tied a ribbon around the black before adhering it down and attached the star with mounting foam, and voila!

I had the goal in mind this year to not have to buy anything for my cards and just use up supplies I already had.  I almost made it, but I did have to buy some silver ribbon and some adhesive.  But that was it, so I was ok with that.

I am really pleased with how my cards turned out this year.  And making a bunch of the same card was kind of nice, instead of trying to come up with a whole bunch of different cards like I’ve done in the past for the blog.  I mean, that was fun, too, but making a batch of cards is a lot easier! 😀

And now, I’m off to grab some food and get on with the rest of my to-do list.  I hope you all have a safe, happy, and warm New Year!


stamps used: hedgehog and Merry Christmas from Stampin’ Up set “Holiday Hedgehogs”, nativity from Stampin’ Up set “The Spirit of Love”, “Glory of Christ” stamp by Stampabilities, star by Denami Design, background stars from Stampin’ Up set “Itty Bitty Backgrounds”

Happy December!

Wow, where has the year gone?  It’s officially December today, the start of Advent, and I’m so excited to be in the Christmas season!  After making Christmas ornaments for the craft show in November through the whole past year, it’s about time to finally be celebrating Christmas!

Speaking of said craft show, it went pretty well.  With it being my first time ever selling Christmas ornaments in my own booth, I didn’t know what to expect.  But I guess my subconscious must have thought that it was good enough to try again, since I bought a bunch of fabric at Joann’s during their Black Friday sales.  🙂

IMG_20181116_084149865

Here’s my festive little booth.  The show probably would have been better had we not endured a blizzard on Friday, which caused the crowds to be SO SLOW!!  Oh well.  It’s something to keep me busy and out of trouble through the year anyway.  Which reminds me, I need to order more styrofoam balls before my coupon expires…

Anyhoo, I wanted to jump on and share a super-quick craft with you that I made for a craft exchange that I’m part of.  In this exchange, we are given information about our giftee, such as what kinds of shows and things they enjoy.  My person really liked Star Trek, especially The Next Generation, so I made these little canvas paintings for her:

IMG_20180922_130718491

Honestly they were really easy.  I just printed out a copy of the Star Fleet insignia and traced it onto the canvases.  I painted the insignias with metallic paints and the backgrounds are as close as I could get to the colors of the uniforms.  The little sample dots on the tops of paint bottles never seem to quite match what the paint actually turns out to look like, so the red especially is a little off.  But I did my best.  I outlined the insignia with a black paint pen, which was the most nerve-wracking part of the whole thing.  If that had messed up?  Well, let’s just say I would have been grateful that the canvases came in a pack of 5.  😀

Happily, my hand was steady enough I didn’t need to make any redos.  And the gal I sent them to seemed to like them, so I guess it was a crafting win.

My next project will be my Christmas cards.  And I’m excited this year because I actually have a fairly decent list of people to send and give cards to.  I’m going to be making two different styles of cards, one for family and friends and the other for a card exchange I signed up for.  I had a design in mind for the first style but I can’t find a stamp I need locally and it’s getting a bit late to order one, so I think I’ll have to shelve that idea for next year and come up with something else.

Hopefully I’ll be sharing the cards with you all in the next couple weeks.  I really had better, since time is running out on getting them made and sent!

Oh, and if you want a great idea for something to do each day during Advent, you can join me in doing this:

advent

Happy reading!

Card #122: Steampunk

A couple months ago my favorite blogger, Jen of Cake Wrecks and Epbot fame, had a milestone birthday.  As her followers celebrated with her, we were given the opportunity to flood her PO box with cards and greetings.  As a long-time fan, and someone who does still enjoy making the occasional card, of course I wanted to participate.  So, with knowing some of her favorite things, I made a card that I thought she’d enjoy.

IMG_20180507_221748663

Jen’s favorite colors are orange and teal, so naturally the card had to be made in those colors.  Such a cheery combination, don’t you think?  She is also hugely into steampunk, and is the original source for my interest in that genre of fandom, so I used my gear stamp and added a couple plastic gears to the card.  Since I was sending the card in a box, I wasn’t worried about the 3D gears going through the mail in an envelope and possibly breaking or ripping off.

So there you have it.  A very specific card for a very specific person.  And really, that’s the most fun kind of card to make.  It’s always more fun and creativity-inspiring to be making a card for a reason.

In other, more personal news, I know I’ve been away for quite a while.  Summer is just so dang busy, amiright?  If you recall several months ago, I shared that I am going to be selling Christmas ornaments at a craft show this fall, and making those has taken up a TON of my free time.  I have made good progress, though, building up a stock.  I’ll share some more pictures at another point.  And now that I am super-into audio books, I am getting lots more done than I was when I was playing a tv show while crafting.  🙂

But I do have about 3 other projects that I’m working on or have finished to share with you, so keep your eyes on this space for new posts coming soon!